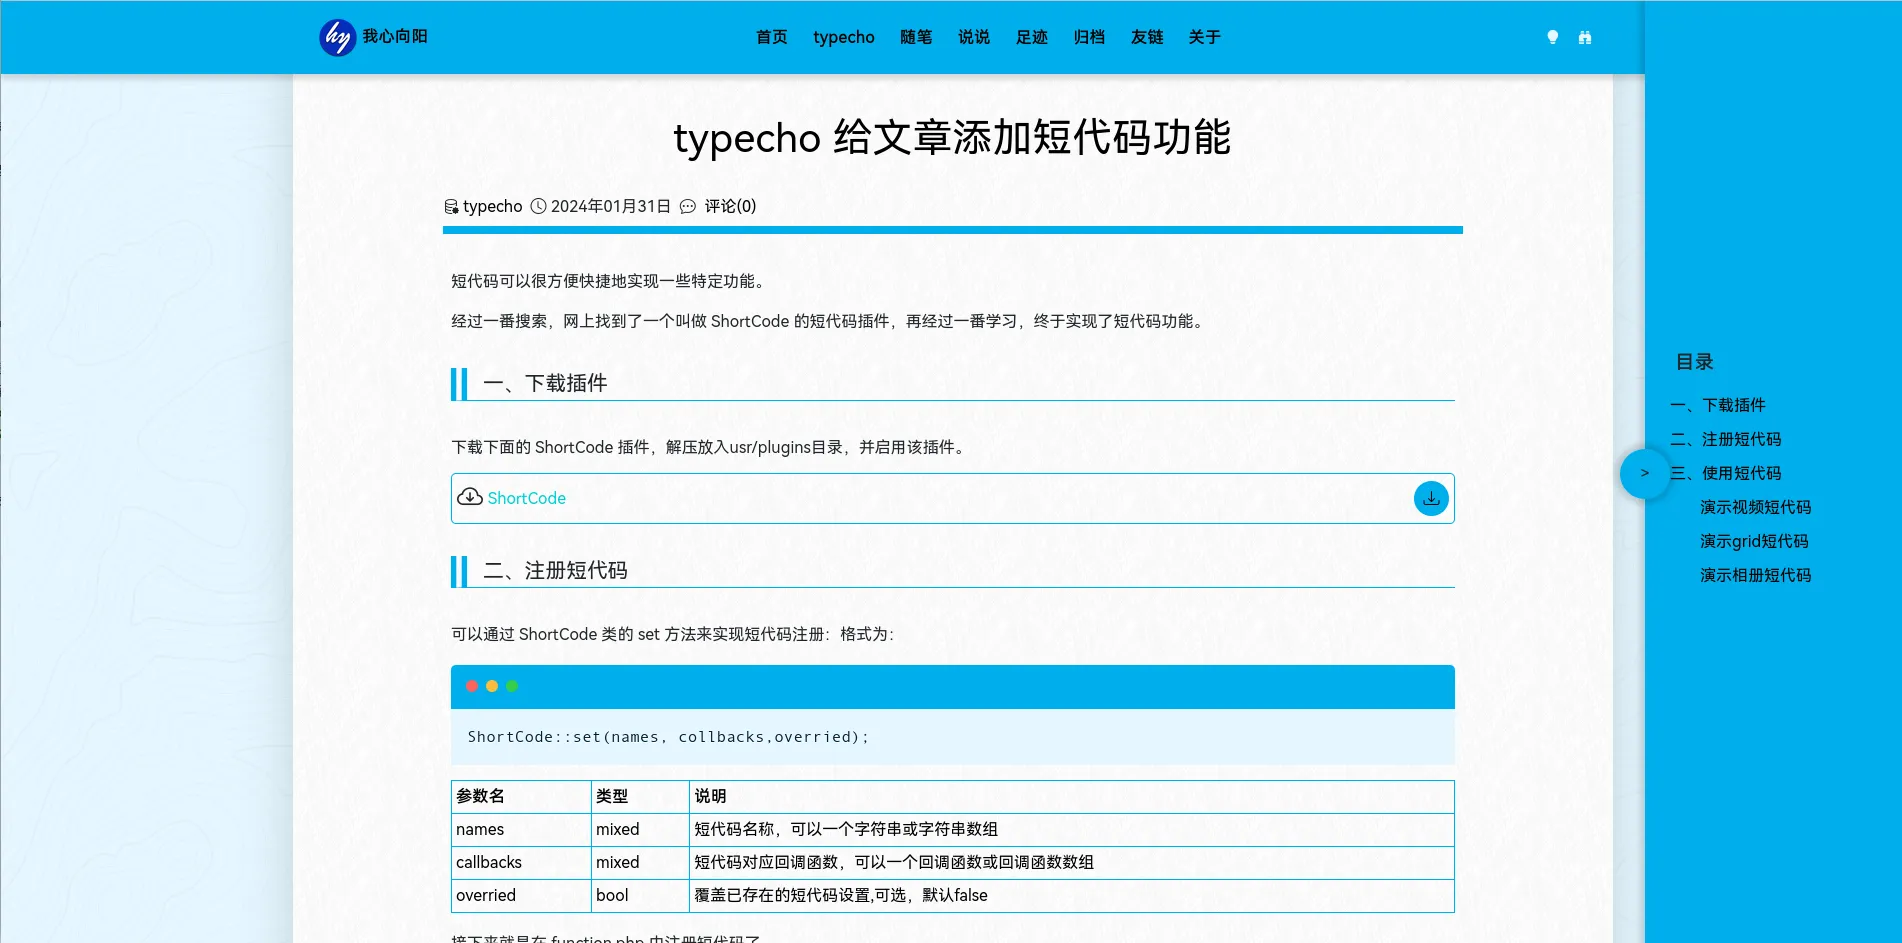
受益于 shortcode 短代码插件和泽泽短代码中目录树的显示样式,修改形成了自己实现添加文章目录的思路:
一、文章目录树的结构
<div id="toc">
    <div class="toc-left">
        <div class="toc-btn" type="button" onclick="changetoc()">></div>
    </div>
    <div class="TOC">目录树区域</div>
</div>
上面用到点击显示目录树的js代码为:
// 推拉toc
function changetoc() {
  var e = document.getElementById("toc");
  if (e.classList.contains("tocwidth")) {
    e.classList.remove("tocwidth");
  } else {
    e.classList.add("tocwidth");
  }
}
二、给文章目录树创建CSS样式
/* -----------------------------------
## 目录树
------------------------------------*/
#toc {
  --toc-width: 260px;
  position: fixed;
  top: 0;
  /* right: 0px; */
  right: calc(-1 * var(--toc-width));
  height: 100vh;
  width: var(--toc-width);
  display: flex;
  flex-wrap: nowrap;
  justify-content: center;
  align-items: stretch;
  z-index: 5;
  transition: 0.5s;
  -webkit-transition: 0.5s; /* Safari */
}
.tocwidth {
  right: 0px !important;
}

.toc-left {
  flex: 1 0 auto;
  display: flex;
  align-items: center;
  margin-left: -25px;
  margin-right: -25px;
  z-index: 6;
}
.toc-left .toc-btn {
  display: flex;
  justify-content: center;
  align-items: center;
  width: 50px;
  height: 50px;
  border-radius: 50%;
  background-color: var(--bd-main);
  cursor: pointer;
  box-shadow: 0 0 5px 5px rgba(0, 0, 0, 0.15);
}

.toc {
  display: flex;
  flex-wrap: nowrap;
  height: auto;
  width: 100%;
  flex-direction: column;
  justify-content: center;
  background-color: var(--bd-main);
  box-shadow: 0 0 5px 5px rgba(0, 0, 0, 0.15);
}

.toc > span {
  background-color: var(--bd-main);/*自定义背景色*/
  display: flex;
  justify-content: left;
  flex-wrap: wrap;
  font-size: larger;
  font-weight: bolder;
  text-align: left;
  padding: 10px;
  margin-bottom: 2px;
  margin-left: 20px;
}

.toc ol {
  list-style-type: none;
  margin-left: 20px;
  padding: 0;
  display: -webkit-flex;
  display: flex;
  flex-direction: column;
  flex-wrap: nowrap;
}

.toc ol li {
  flex: 0 0 auto;
  width: 100%;
  padding-left: 0px;
}

.toc ol ol {
  padding-left: 5px;
}

.toc li li {
  padding-left: 5px;
}

.toc ol li a {
  display: block;
  padding: 5px;
  white-space: nowrap;
  text-overflow: ellipsis;
  overflow: hidden;
}

.toc ol li a:hover {
  background-color: var(--bd-main);
  color: white;
}
三、在 function.php 中建立目录树实现函数
//生成目录树
function toc($content)
{
    $html = '';
    $dom =  new DOMDocument();
    libxml_use_internal_errors(true);
    $dom->loadHTML('<meta http-equiv="Content-Type" content="text/html; charset=utf-8"/><body>' . $content . '</body>');
    libxml_use_internal_errors(false);
    $xpath = new DOMXPath($dom);
    $objs = $xpath->query('//h1|//h2|//h3|//h4|//h5|//h6');
    if ($objs->length) {
        $arr = [];
        $html = '<div class="toc"><span>目录</span>';
        foreach ($objs as $n => $obj) {
            $obj->setAttribute('id', 'TOC' . $n);
            handleToc($obj, $n, $arr, $html);
        }
        foreach ($arr as $n)
            $html .= '</li></ol>';
        $html .= '</div>';
        $html = '<div id="toc"><div class="toc-left"><div class="toc-btn" type="button" onclick="changetoc()">></div></div>' . $html .'</div>';
    }
    return $html;
}

//处理目录树
function handleToc($obj, $n, &$arr, &$html)
{
    $i = str_replace('h', '', $obj->tagName);
    $j = end($arr);
    if ($i > $j) {
        $arr[] = $i;
        $html .= '<ol>';
    } else if ($i == $j)
        $html .= '</li>';
    else if (in_array($i, $arr)) {
        $html .= '</li></ol>';
        array_pop($arr);
        handleToc($obj, $n, $arr, $html);
        return;
    } else {
        $arr = [$i];
        $html .= '</li>';
    }
    $html .= '<li><a href="#TOC' . $n . '">' . $obj->textContent . '</a>';
}
四、在 post.php 中调用目录树函数
<!-- 输出文章目录 -->
<?php echo toc($this->content); ?>
五、大功告成,体验效果如下


